Ah, this is a post I’ve been wanting to create for a while! I got an air fryer well over a year ago and I use it for a TON of stuff. Roasted chickpea snacks? Homemade tortilla chips? Potato wedges or oil-free sweet potato fries? Definitely.
BUT – my favorite thing to make in the air fryer is tofu! Slice some firm tofu and stick it in the air fryer for 10 minutes and it ends up crispy on the outside, slightly puffy, with a moist, custard-like, meaty interior. Even with nothing fancy added, the tofu comes out good enough to eat all by itself. But we’re not stopping there, of course. Below, I’ve got my three favorite recipes for making tofu in an air fryer – each a completely different flavor, texture, and style.
A note about air fryers… if you’re new to this technology, an air fryer is basically just a giant drum that circulate super-hot air very quickly so that the contents cook much like frying, but without the oil. If you mashed a typical oven and a deep fryer into a gigantic silly-looking ovoid shape, you’d have an air fryer! I have this GoWISE model and I kind of hate it. The handle sometimes pops out dangerously when you lift it, and the controls are baffling. I’m sure there are better models out there… And now, onto the tofu!
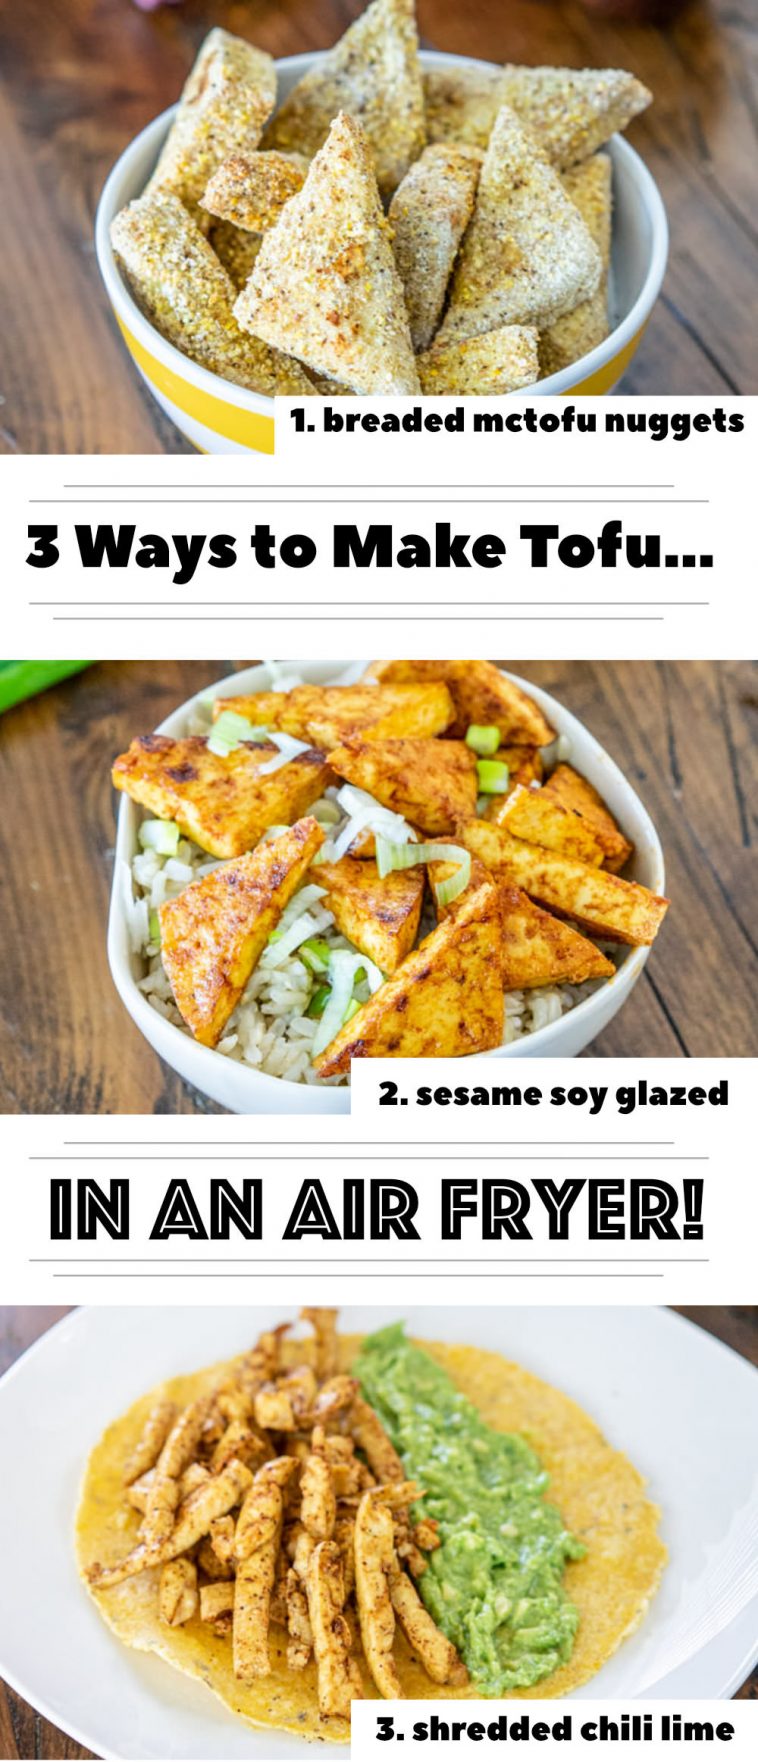
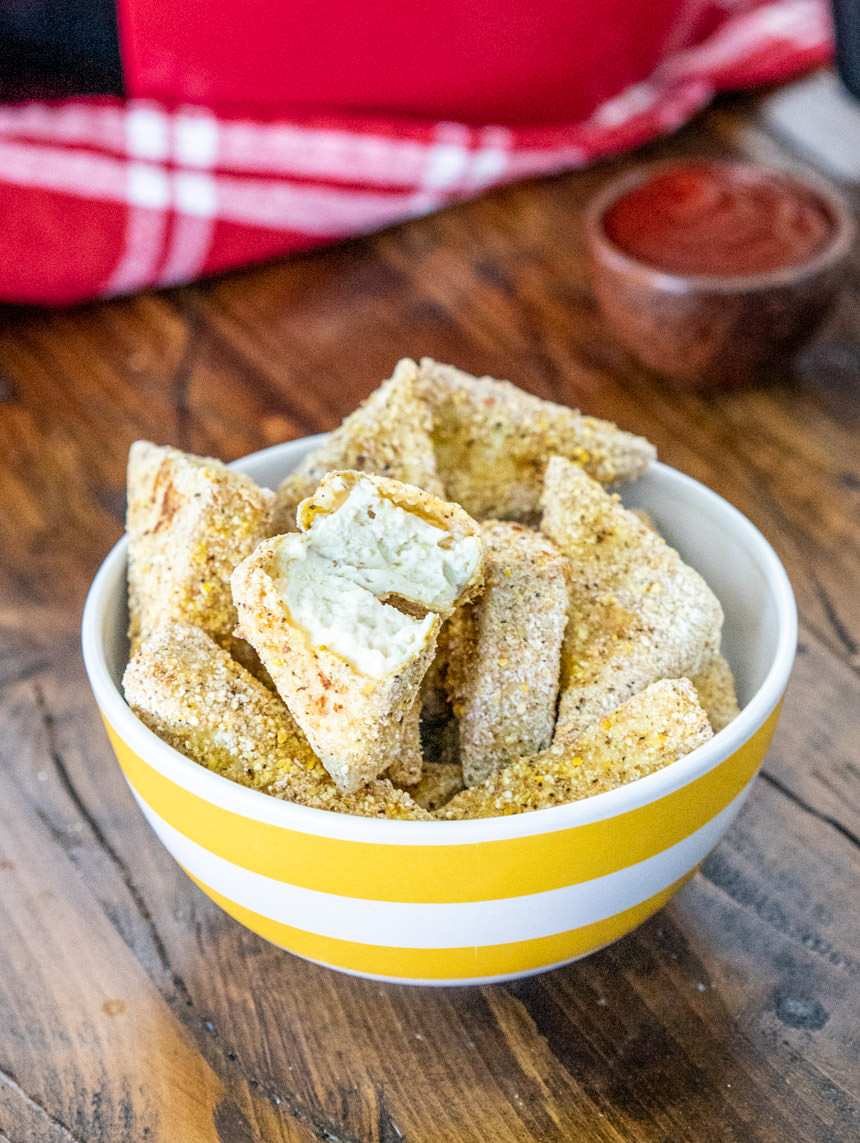
1. Breaded McTofu Nuggets
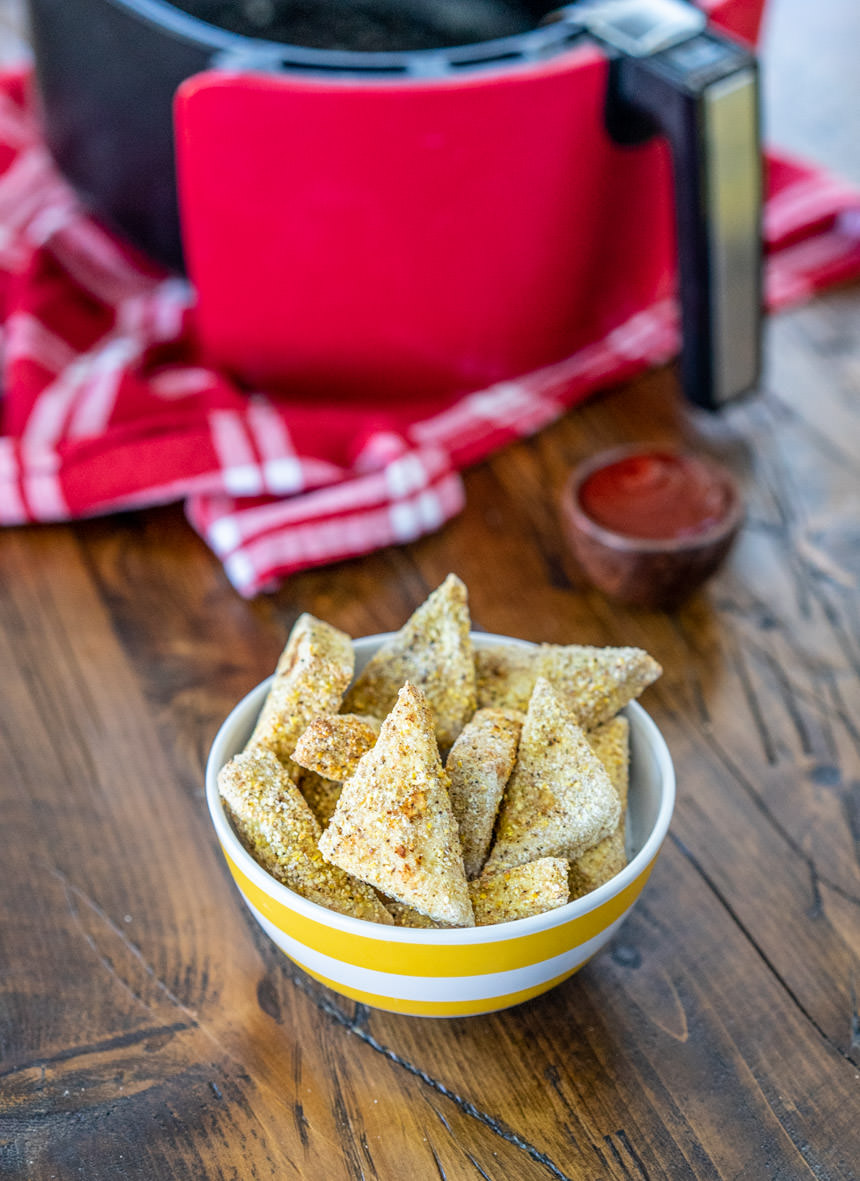
Let’s start with the one I make most often. “McTofu” nuggets breaded with a 30-second mixture of cornmeal, whole wheat flour, garlic, and black pepper. I have a similar recipe for these in the oven, but the air fryer version is so much better (and simpler). The outsides get so crispy and the insides stay juicy. They’re one of my favorite snacks, but also work really well in wraps, on pasta (seriously), or as half of a meal with some baked sweet potatoes…
Ingredients:
- 8 oz extra firm tofu
- 2 tablespoons whole wheat flour
- 2 tablespoons cornmeal
- 1/2 teaspoon black pepper
- 1/4 teaspoon garlic powder
- Pinch of salt
Step One
Slice the tofu into fairly thin nugget-sized wedges and *do not* squeeze out the water – it will be used to soak up the breading.
Step Two
Mix all the other ingredients into a small bowl. Drop each tofu nugget into the breading and toss it around to coat thoroughly. Place each into the air fryer.
Step Three
Fry! Set your air fryer to 370º F and cook for about 5-7 minutes, then flip and continue until the breading has become more golden and the nuggets are slightly puffy.
Serve with your favorite sauce (ketchup? Cashew ranch? Hummus?) or use in any dish you want. Note: they are quite good cold as leftovers as well, as the breading softens and they take on a whole different texture.
2. Sesame Glazed Tofu
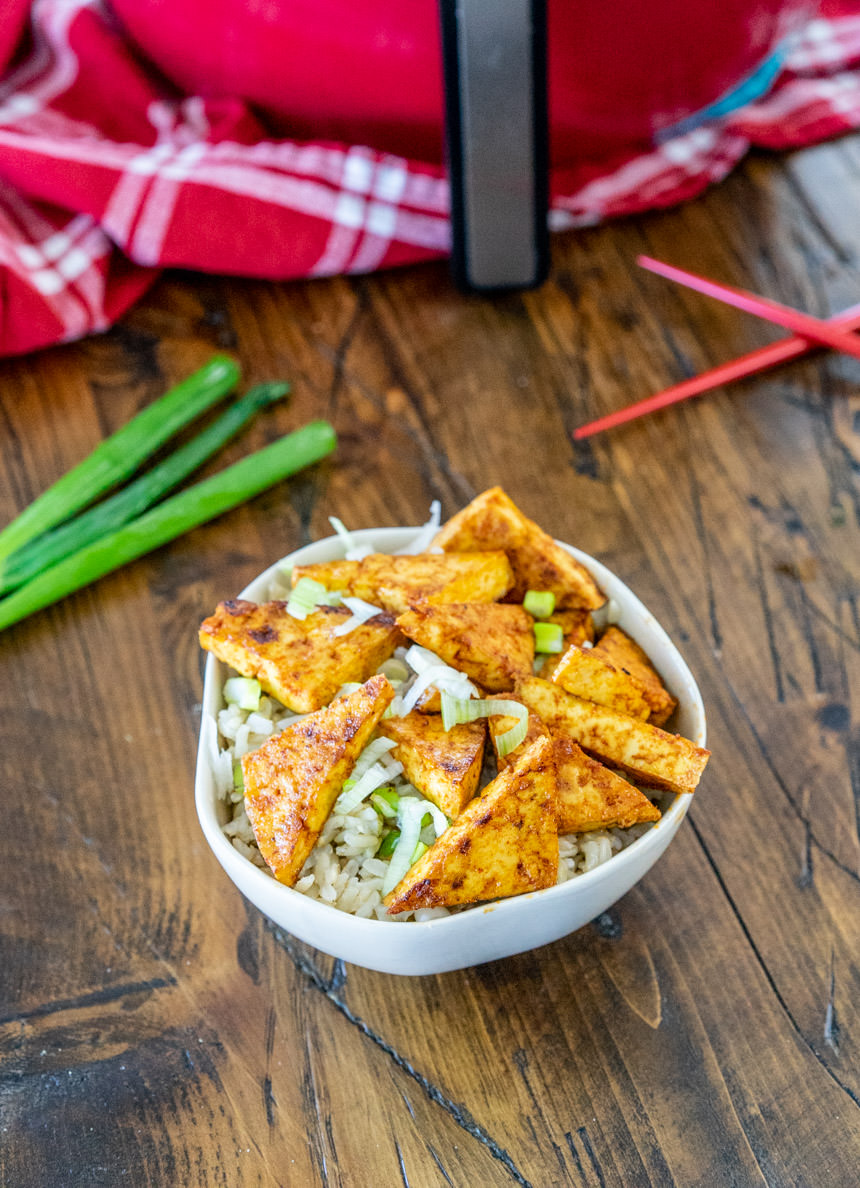
This is probably the most “classic” way to make tofu and (like all the other methods here) the air fryer does it better. The idea is that we first fry the plain tofu until it completely dries out (about 8 minutes, then drench in a sesame soy maple glaze, fry until it caramelizes, then dip and fry again until it’s ridiculously tasty.
Ingredients:
- 8 oz extra firm tofu
- 1 tablespoon soy sauce
- 1 tablespoon maple syrup
- 1 teaspoon toasted sesame oil
- 1 teaspoon vinegar (rice wine?)
- 1/4 teaspoon smoked paprika
- 1/4 teaspoon garlic powder
Step One
Cut the tofu however you’d like – wedges, planks, squares, cubes, etc! Then, use paper towels to squeeze out as much water as possible.
Step Two
Transfer this plain tofu to the fryer and fry for several minutes until dry and slightly golden. Meanwhile, make the glaze by combining the rest of the ingredients – soy, maple, sesame oil, vinegar, paprika, and garlic powder.
Step Three
Carefully remove the hot tofu and dip into the bowl of glaze. Give each piece 10 seconds on each side to absorb as much glaze as possible before returning to the fryer and cooking for about 3-4 more minutes until the glaze has reduced and caramelized.
Step Four
As if that wasn’t enough, repeat step three for another round of glaze, cooking just before the soy starts burning (about 3 more minutes) and allow to cool before serving in a rice bowl or just as a delicious snack.
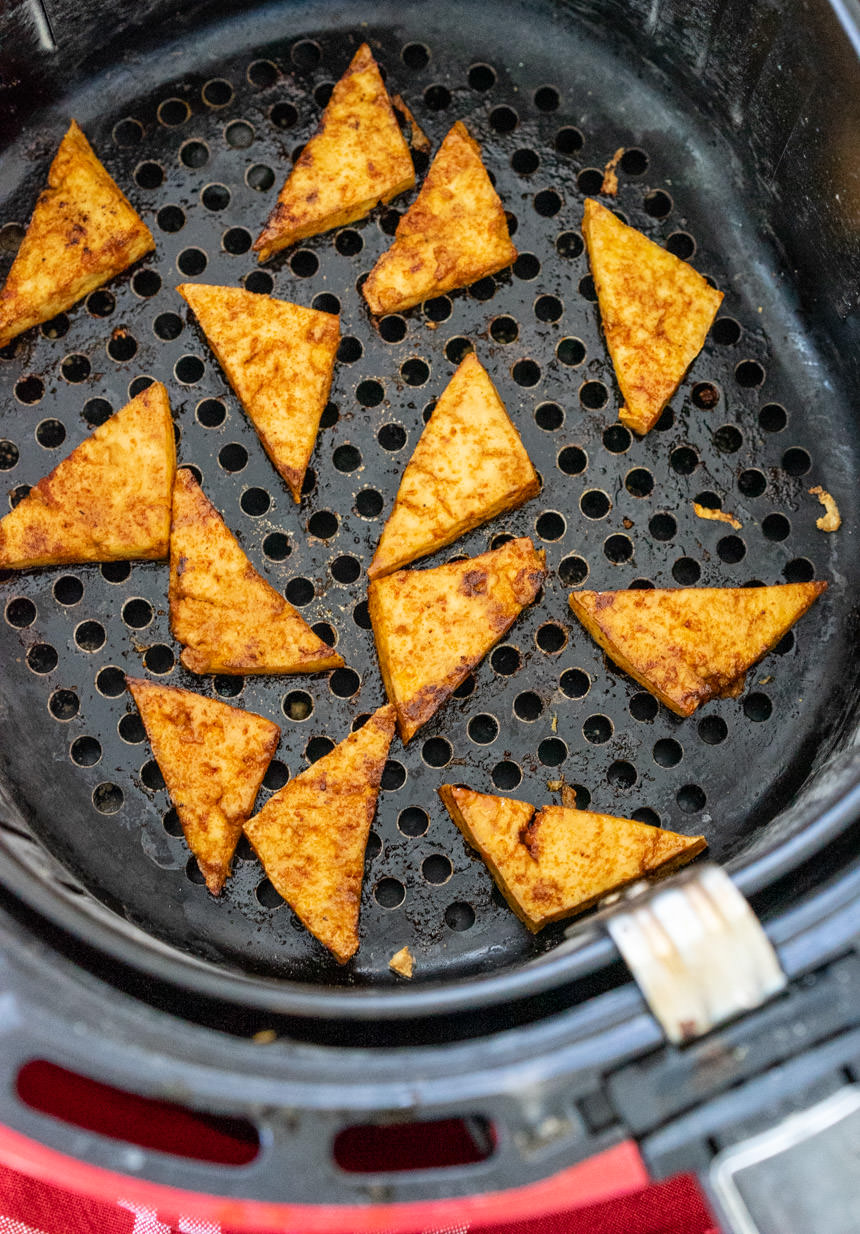
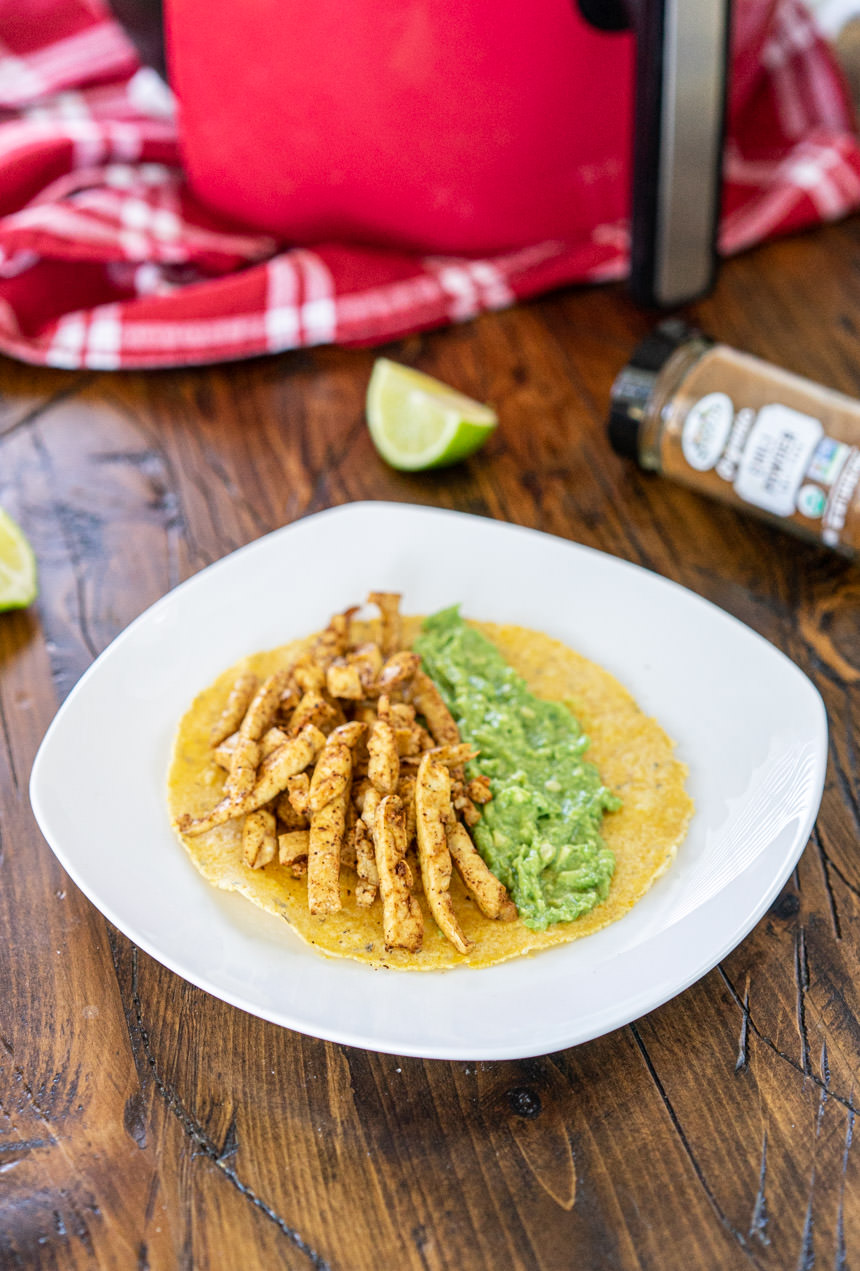
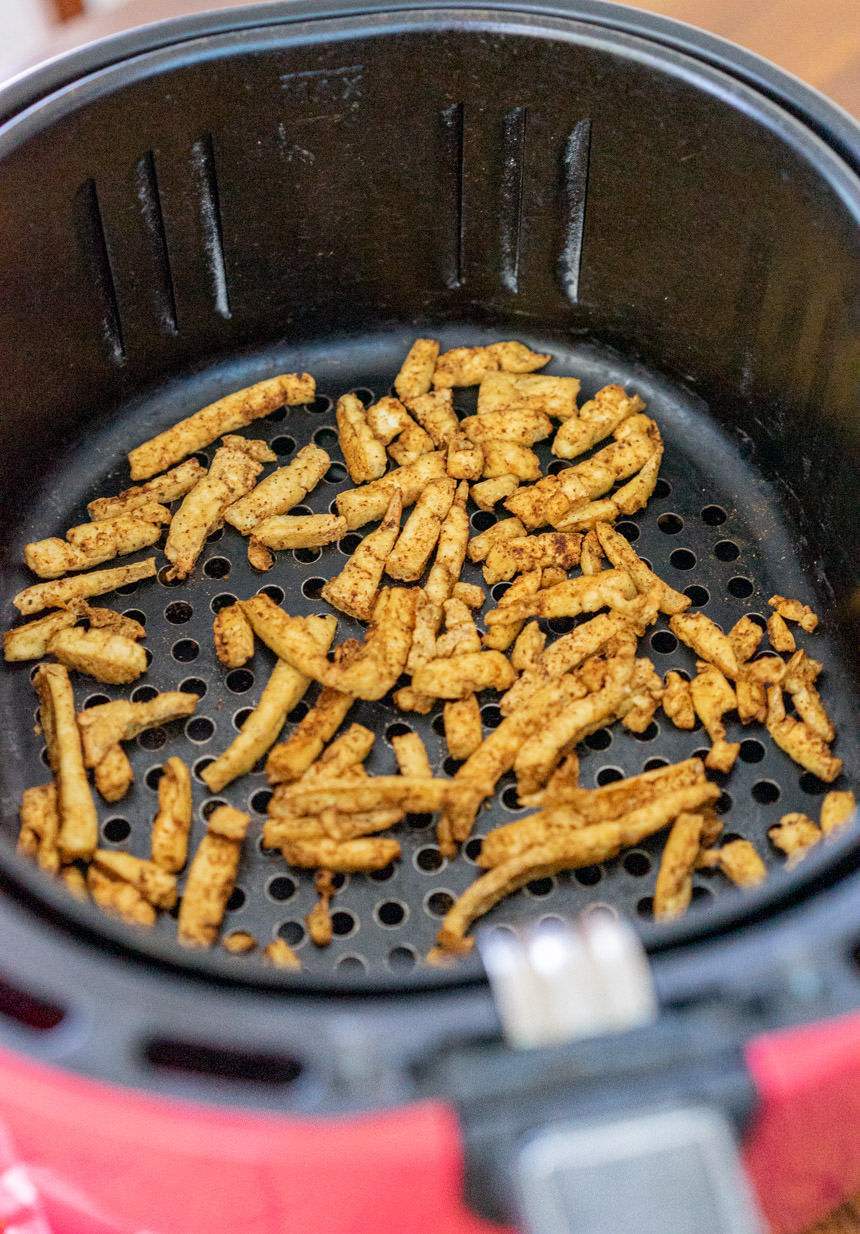
3. Shredded Chili-Lime Tofu
This is definitely the craziest of the bunch. I ended up discovering it on accident while making some tofu tortilla soup. I put some planks tofu in the air fryer for a few minutes, then took them out to cut into thin strips, and it actually shredded beautifully. Then, I added some spices and returned to the fryer until they dried out and they were super delicious… probably the most unique tofu I’ve ever made.
Ingredients:
- 8 oz extra firm tofu
- 1 tablespoon lime juice
- 2 teaspoons chili powder blend
- 1/4 teaspoon salt
Step One
Cut the tofu into long thin planks (definitely no thicker than 1/4 inch) and use a paper towel to squeeze out the excess liquid. Then add these to your air fryer at 370º F until the surface dries out and starts to turn slightly golden.
Step Two
Carefully transfer these hot slices to a cutting board. Using a sharp knife take your time to basically shred these slices into very, very thin pieces with lots of random sizes (even thinner than the ones pictured, I cut those too large). Then sprinkle on some chili powder, salt, and lime juice and toss to evenly coat.
Step Three
Right now, these will be quite soggy and weird, but put them back into the air fryer and continue frying until they become dry and almost slightly crispy – stopping every few minutes to toss and add a little more of the spices and lime juice if needed.
These are amazing anywhere you might want to replace shredded chicken in a recipe, like on corn tortillas with avocado, in burritos, on nachos, soups, or whatever you can imagine…


Thank you, Andrew, this was perfect timing! I just got an air fryer I haven’t even used once yet. I’m looking forward to giving these recipes a try.
Oh awesome, that IS perfect timing 🙂 I hope you like these tofu recipes!
Hi Andrew, wow this looks so tasty !! I didn’t know air fryer. Even if I prefer cooking at low temperature, it’s good to know, and it’s surely better than oil fryer !
Have a nice day 🙂
Definitely, they can be handy! Thank you, Claire, I hope you have a nice day as well 🙂
All the recipes look good, but I’m going to try the sesame-glazed tofu first. It’s very similar to my favorite way of preparing tofu–sliced 1/4″ thick and sauteed in a pan until crispy with a little soy sauce and sesame oil sprinkled over. Served between two slices of bread or toast, it tastes like a fried egg sandwich to me.
That would be a great one to start with, Lorrie! I love the idea of serving it between bread, I don’t think I’ve ever done that, but it sound delicious.
My air fryer doesn’t look like this. It has a centre rotating arm that can be taken off and I am supposing it would work well. It doesn’t have a vented tray. We usually do tofu in the frying pan but I love my air fryer and hope we can use these recipes.
Weird, I don’t think I’ve seen one with a center arm. I hope these recipes work for you, Lynn!
Andrew; I just wanted to thank you for your hard work and generosity is providing all the recipes and helpful information that you so freely give.
I have been following you for years and haven’t yet made any of your recipes that weren’t delicious and simple to make.
That really means a lot, thanks so much for the nice comments. It’s always a nice boost to hear that my work is helpful, and I will keep it coming 🙂 Have a great weekend!
Hi Andrew – great recipes! The tofu mcnuggets are a little unclear – you said cook them at 370 for 5-7 minutes and then flip – what happens after you flip? Do you continue cooking them for another 5-7 minutes?
Thanks! Rachael
Hi Rachael, the way I wrote it is, “cook for about 5-7 minutes, then flip until the breading has become more golden and the nuggets are slightly puffy” which is exactly what to do. After you flip, check on them every few minutes until golden (prob. another 5-7 minutes).
Air fryer temperature? Or just wing it?
You know, I don’t think I’ve ever changed the temp from the default 370º F so I didn’t even think to include that here, so 370º works, but yes you can probably just wing it 🙂
The sesame soy glazed tofu was delicious. Will definitely make this, again.
Just got my AF Oven and the fist thing I made was FF (chips) in the rotating basket…I was SO disappointed… that was yesterday. Today, I just made your ‘floured’ ones and OMG, I’m now IN LOVE with my AF!!
Thank you SO MUCH! Can’t wait to try the other two now… but interestingly, it takes awhile to find your ‘nitch’ so to speak in how to set up everything on the counter; I mean the oven mits are too thick, the rubber gloves are too think; where do you put your trays out of the oven kind of thing? It will all work out; just strange in the beginning…
Thanks for these amazing recipes and giving me my confidence back!
Hey Nancy, that’s awesome! 🙂 I’m glad you enjoyed this recipe and I hope you like the other two as well. Thanks for taking a minute to let me know.