I recently started cooking my own chickpeas from scratch instead of buying them canned and there’s at least 37 really good reasons to do this. For example:
– They taste a million times better
– They cost a fraction of canned chickpeas ($1.60 per pound, or about 4x cheaper)
– You can control the sodium
– No added chemicals, preservatives, or weird stuff like BPA from the can liners.
– By freezing a few bags, you always have a convenient supply of cooked chickpeas right when you need them.
The first time I made these, I practically ate the entire batch like it was popcorn. Freshly-cooked chickpeas have a much more satisfying firm texture, softer flavors, and a sense of freshness that you just can’t get from something that’s been sitting in brine for months.
Best of all, the process of cooking chickpeas is incredibly simple, so I thought I’d put together a quick tutorial on how it’s done. Trust me, you’ll never go back to canned beans again…
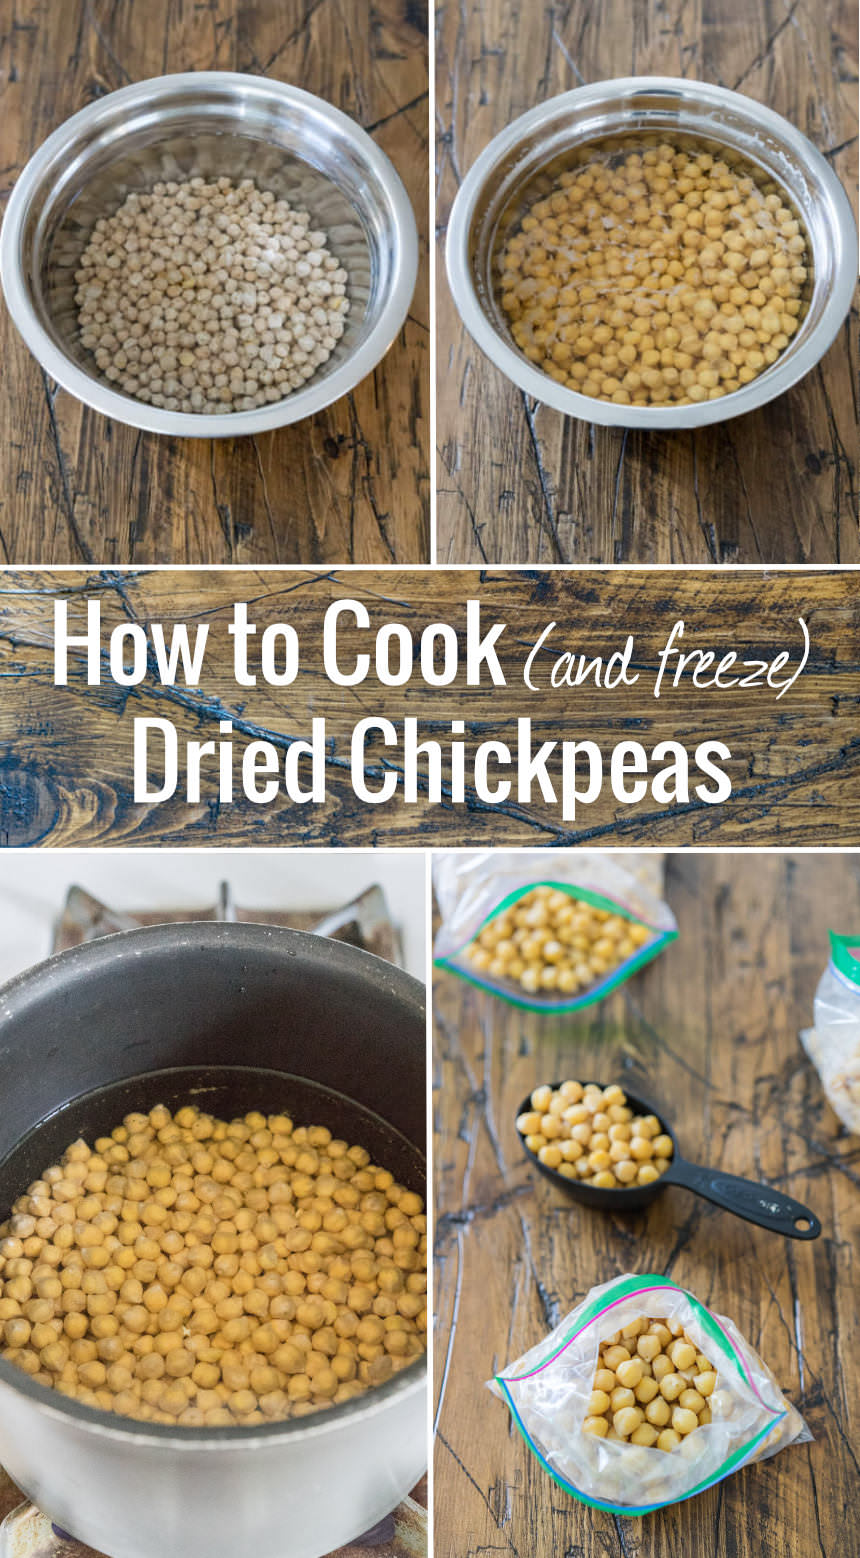
Step One: Buy
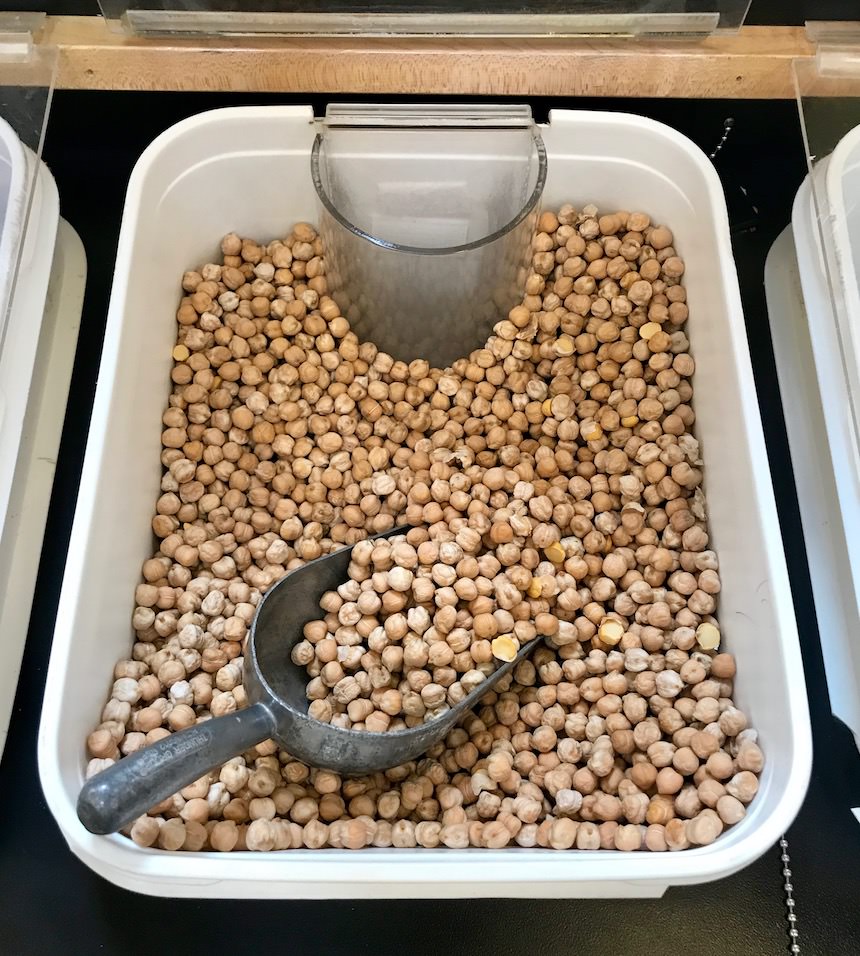
Repeat after me: “I will not be afraid of the bulk bins.” Seriously, the bulk bins are my favorite part of the grocery store. You can save 50% or more on products that are (usually) fresher and have less waste than their prepackaged counterparts. That’s definitely the case here. $1.60 for a pound of chickpeas will yield about 3.5 cans which would cost 4-5x as much.
So grab the big spoon and measure out about a pound of chickpeas. See how easy this is so far?
Step Two: Soak
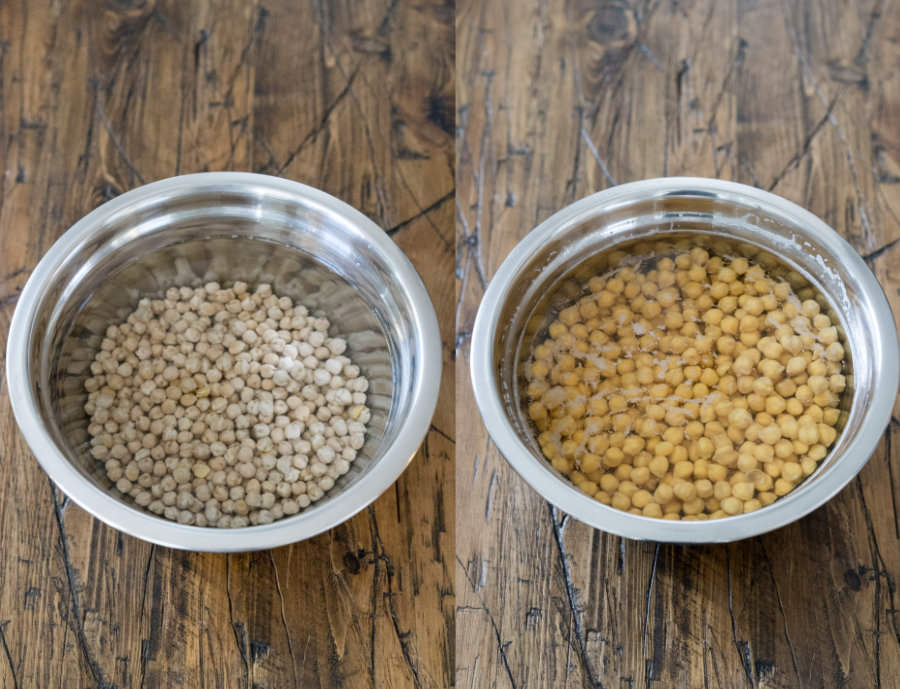
Chickpeas need to soak before cooking – preferably overnight. You might be able to get by with 3 hours, but 8 is ideal. A good rule of thumb is to allow them to double in size, as you can see from the photos above.
I like to rinse the chickpeas as well. So pour them into a large bowl and fill with water, then run your hands through them to sort out any debris. Pour that water out and fill again with fresh soaking water. Set aside overnight.
Step Three: Cook
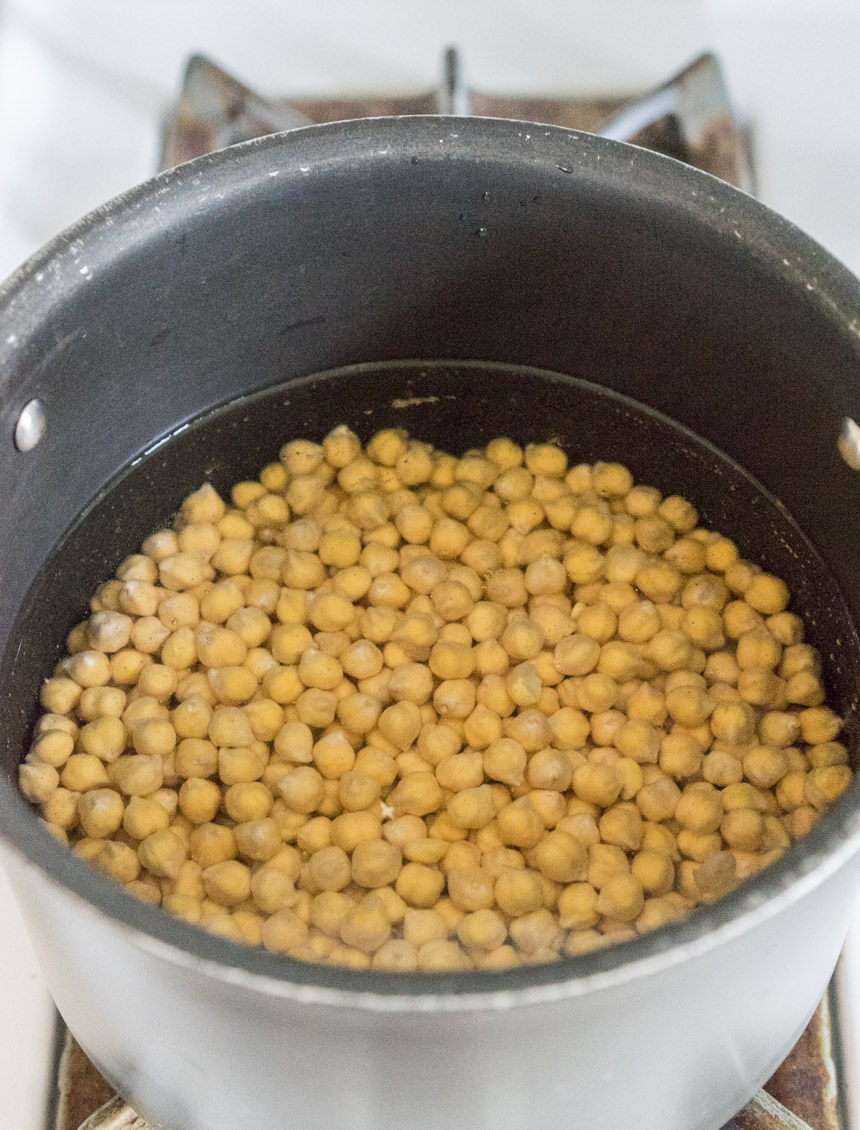
You need to cook the chickpeas for an hour, or up to 90 minutes if you want them really soft. So begin warming a big stockpot of water. Drain the chickpeas of their soaking water and pour them into the stockpot when it reaches a boil. If you want salty chickpeas, now is the time to add salt into the water. I added a full teaspoon (remember, most of it will get drained out with the water) and they turned out perfect. Now turn down the heat slightly and allow them to simmer for 60+ minutes.
Step Four: Drain
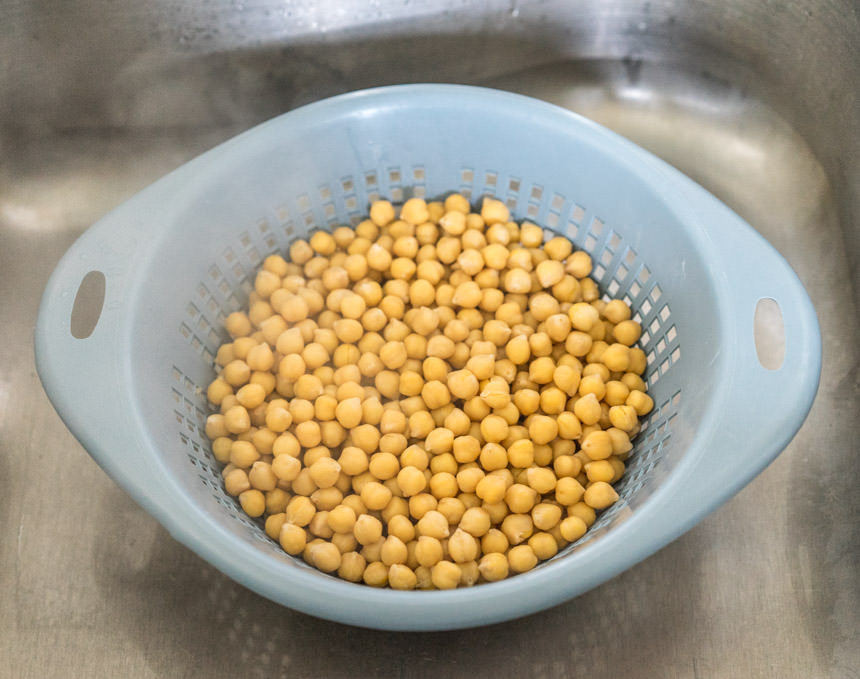
If you’re freezing the chickpeas (next step), draining is super important to remove the moisture so that you don’t end up with a bag of ice later on. Once you’ve tasted the chickpeas to ensure they’re soft and the raw/green taste is gone, remove them from the heat and carefully pour them through your colander (preferably a 1970’s-era baby blue one…) and just let them sit there for 10-20 minutes, so that the steam & moisture can evaporate. You can use these as-is now, or freeze them for later use.
Step Five: Freeze
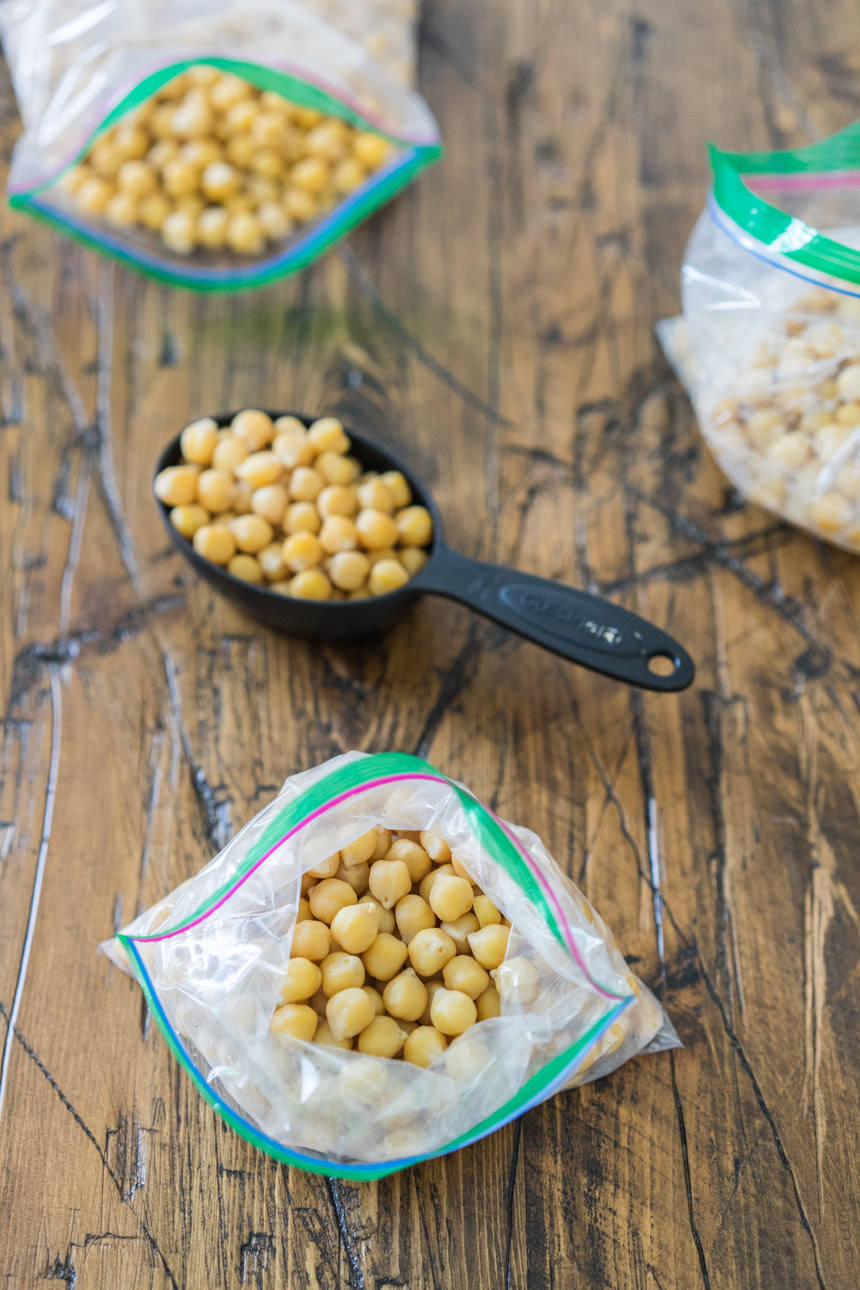
The best way to make sure you always have chickpeas on hand is to make a big ol’ batch like this and then freeze them so that you don’t have to go through this entire process each time you want some curry or chickpea tuna salad. So, once the chickpeas are thoroughly drained and dry, pour them into a Tupperware container or zip-top bag and freeze for up to a year.
Pro Tip: One of the problems with fresh chickpeas is trying to figure out how many to use in recipes that call for “1 can of chickpeas.” I figured out that one can is approximately 14 oz (by volume) of chickpeas. So get out a measuring cup and portion out 14 oz of chickpeas into each zip-top bag and freeze each “can” individually.
That’s all there is to it! If you’re ready to kick the can for good, you can apply the same process to all the canned beans in your cupboard for fresher, cheaper, tastier, and (potentially) healthier beans that are just as convenient as the slimy canned versions.


Hi. Thanks for the awesome tips. I will find this especially useful as I go thru a lot of canned chickpeas! My one question is, being that these are not canned, is the aquafaba product generated thru any of these steps? Would it be the boiled water?
Thank you in advance!
Hey Steph, that’s a good question. I am familiar with aquafaba but I don’t use it enough (or understand exactly how it’s generated well enough) to say for sure. I did notice that the boiling water gets very foamy on top, but I couldn’t say if that would actually work as aquafaba. Unless you’re using a ton of it, you might just want to buy an occasional can of chickpeas for the aquafaba.
Hello Steph and Andrew, I use the water from boiling in a lot of recipes. It’s often not as concentrated as aquafaba as I tend to boil the chickpeas in too much water, but the thick water is great in bread and muffins.
I honestly believe that you would have to pressure can those beans and then the liquid from that process would be the aquafaba. It’s just what I “think” so don’t know as a fact. Makes sense to me. But the boiling water —my thinking is no way.
:>)
I believe I’ve read that you can make aquafaba from the water in which you have cooked dry chickpeas, but have no experience of it myself. The only way to know is to try it out, I’d say. 🙂
I actually freeze my chickpeas (and any other dry beans) in their liquid, usually in old jam/veganaise/chocolate spread/etc. jars. I find it works quite well and saves on plastic bags. For some recipes, it is quite nice to use the liquid in cooking, for example a bean chilli.
I have had one case where the jar broke (can happen if you don’t leave enough space for the water to freeze), but it wasn’t too bad. I just put a little bag around them when I first put them in the freezer so that if there is any breakage there isn’t too much to clean up!
This is an great tip, Andrew. It comes in handy for emergency hummus.
Another way to prepare for freezing is to spread the beans on a cookie sheet after draining and freeze. Once frozen the beans break apart very easily (and stay apart) and can be portioned out quite easily.
Frozen beans for the win!
You know you’re a vegan when you have emergencies that require hummus, hahaha :p
Yes! Freezing single layer on a tray is a great way to go. That’s what I usually do with berries in the summer and it would work well for chickpeas too.
I made chickpea salad with the cooked ones from dry beans, and it was the best tasting I ever made. By the way, 3/4 cup dry beans equal a can of cooked.
Do you have any instant pot recipes?
I do not! But I do have an Instant Pot and I should definitely make one… thanks for the idea 🙂
Excellent! Thank you for the great recipe and step by step! Very informative, easy and entertaining! What’s hilarious is I hadn’t read all the way through until commenting…because I’m horrible like that….never read directions all the way through!!! but I actually have them draining in a powder blue Tupperware colander